Before You Begin
Note
Remember: Make sure you have completed all of the required prerequisite procedures before you configure the agent.
Verify the Exchange Server Name and the Exchange Version. The version of Exchange Server that you use determines which configuration procedures you must perform.
Procedure
-
From the CommCell Browser, expand client.
-
Right-click the agent, and then click Properties.
The Exchange Mailbox (Classic) Properties dialog box appears.
-
Configure your environment based on the version of Exchange Server that you use.
-
For Office 365 with Exchange, configure Office 365 with Exchange first, and then configure the subclient. For more information, see the Configuring the Subclient section on this page.
-
For all other versions of Exchange Server, configure the subclient.
-
Configure Office 365 with Exchange
|
Important: On October 31, 2017, Microsoft ended support for RPC over HTTP for Office 365. For more information, see the Microsoft support article: "RPC over HTTP reaches end of support in Office 365 on October 31, 2017", https://support.microsoft.com/en-us/help/3201590/rpc-over-http-reaches-end-of-support-in-office-365-on-october-31-2017. After December 15, 2018, Commvault will not support backup nor archiving operations using Office 365 (Exchange Online) for the Exchange Mailbox (Classic) Agent nor OnePass for Exchange Mailbox (Classic). Transition to the Exchange Mailbox Agent. The Exchange Mailbox Agent uses EWS for backup and archiving instead of MAPI. For information, see Transitioning to the Exchange Mailbox Agent. |
Before You Begin
Review the considerations for backing up Office 365 with Exchange mailboxes.
To configure Office 365 with Exchange, you must:
-
Configure an Office 365 with Exchange-only environment if you do not use a hybrid environment.
-
Verify the execution policy
-
Disable MAPI over HTTP
-
Configure an Office 365 with Exchange (Exchange Online) Administrator account
-
Create a service account profile for Outlook
-
Disable the User Account Control setting in Windows
-
Skip user impersonation
-
Prevent backup failures caused by logon errors
-
Prevent backup failures caused by MAPI network errors
Configure an Office 365 with Exchange-Only Environment
If you use an Office 365 with Exchange-only environment, and not an Exchange hybrid environment that has an on-premises Active Directory that is synchronized with Office 365 with Exchange, you must configure the nExchangeOnlineOnly additional setting for discover and backup operations to complete.
Procedure
-
From the CommCell Browser, expand Client Computers.
-
Right-click the client, and then click Properties.
The Client Computer Properties dialog box appears.
-
Click Advanced.
The Advanced Client Properties dialog box appears.
-
Click the Additional Settings tab.
-
Click Add.
The Add Additional Settings dialog box appears.
-
In the Name box, type nExchangeOnlineOnly.
-
In the Value box, type 1.
-
Click OK.
Configuring Office 365 with Exchange Administrator Accounts
In this procedure, you configure the Exchange Administrator (Windows user) account, and the Office 365 with Exchange (Exchange Online) Administrator Account.
Procedure
-
From the CommCell Browser, expand Client Computers > client.
-
Right-click the agent, and then click Properties.
The agent Properties dialog box appears.
-
Click Change Account beside Exchange Administrator Account.
The Change Exchange Administrator Account dialog box appears.
-
Enter the credentials that you use to log on to Windows.
-
Select the Exchange Online check box.
A warning message appears.
-
Click OK.
-
In the Profile Name box, type the Microsoft Outlook profile name.
-
Click Change Account beside Exchange Online Administrator Account.
The Change Exchange Administrator Account dialog box appears.
-
In the Exchange Administrator Account box, type the primary SMTP address of the online account.
The primary SMTP address is the address that you use to connect to Office 365 with Exchange using Windows PowerShell.
-
In the Password box, type the service account password, and then type the password again in the Confirm Password box.
-
Click OK.
Skip User Impersonation
On the proxy client, configure the appropriate services to use the Windows user log on account, and then disable user impersonation.
Procedure
-
On the proxy client, in Windows, click the Start button.
-
In the Search box, type services.msc, and then press Enter.
The Services snap-in appears.
-
Configure the Commvault Communications Service to use the Windows user log on account.
-
In the services list, right-click Commvault Communications Service, and then click Properties.
The Commvault Communications Service Properties dialog box appears.
-
Click the Log On tab.
-
Select This account, and in the corresponding box, type the name of the Office 365 with Exchange service account.
-
In the Password box, type the account password.
-
In the Confirm password box, type the account password again.
-
Click OK.
-
In the services list, right-click Commvault Communications Service, and then click Restart.
-
-
Configure the Commvault Client Manager Service to use the Windows user log on account.
-
In the services list, right-click Commvault Client Manager Service, and then click Properties.
The Commvault Client Manager Properties dialog box appears.
-
Click the Log On tab.
-
Select This account, and in the corresponding box, type the name of the Office 365 with Exchange service account.
-
In the Password box, type the account password.
-
In the Confirm password box, type the account password again.
-
Click OK.
-
In the services list, right-click Commvault Communications Service Properties, and then click Restart.
-
-
On the client where the Exchange package is installed the agent is added, disable user impersonation by adding the nSkipUserImpersonation additional setting as shown in the following table.
For instructions about adding the additional setting from the CommCell Console, see Adding or Modifying Additional Settings from the CommCell Console.
Property
Value
Name
Category
MSExchangeMBAgent
Type
Integer
Value
1
Preventing Backup Failures Caused by Logon Errors
To prevent backups from failing because of mailbox logon errors, reset the MAPI session using the nMailboxesPerSession additional setting. The value in the additional setting is the number of mailboxes that are backed up before the MAPI session is reset. We recommend that you set the value to 1 for an Office 365 with Exchange environment.
Procedure
-
From the CommCell Browser, expand Client Computers.
-
Right-click the client, and then click Properties.
The Client Computer Properties dialog box appears.
-
Click Advanced.
The Advanced Client Properties dialog box appears.
-
Click the Additional Settings tab.
-
Click Add.
The Add Additional Settings dialog box appears.
-
In the Name box, type nMailboxesPerSession.
-
In the Value box, type 1.
We recommend that you set the value to 1 for Office 365 with Exchange.
-
Click OK.
Preventing Backup Failures Caused by MAPI Network Errors
A network error (MAPI_E_NETWORK_ERROR) might cause the backup or archive of Office 365 with Exchange mailboxes that are larger than 5 GB to fail. To prevent this, you must configure the nRestartMAPIOnNetworkError additional setting.
Procedure
-
From the CommCell Browser, expand Client Computers.
-
Right-click the client, and then click Properties.
The Client Computer Properties dialog box appears.
-
Click Advanced.
The Advanced Client Properties dialog box appears.
-
Click the Additional Settings tab.
-
Click Add.
The Add Additional Settings dialog box appears.
-
In the Name box, type nRestartMAPIOnNetworkError.
-
In the Value box, type 1.
-
Click OK.
-
Restart the services.
Result
If a network error occurs while an Exchange mailbox backup or archive job is running, the job will resume at the same folder and the same message in the mailbox that was being processed when the job was interrupted by the network error.
Configuring the Subclient
-
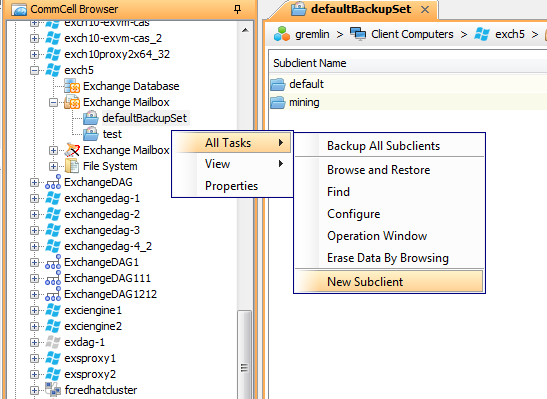
From the CommCell Browser, expand Client Computers > client > agent.
-
Right-click defaultBackupSet, and then click All Tasks > New Subclient.
-
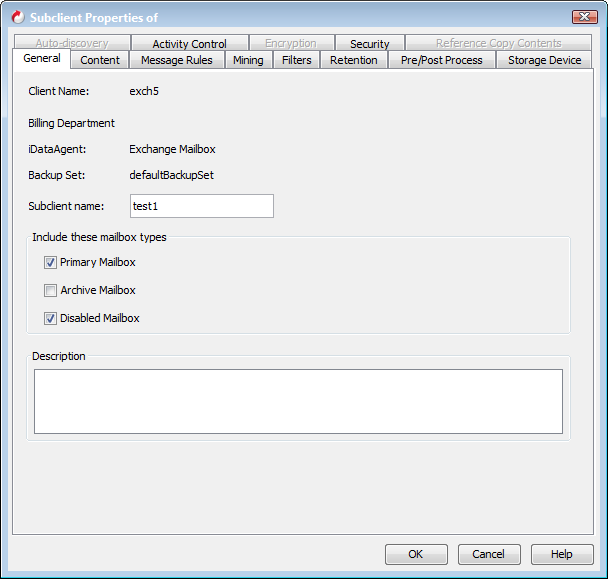
On the General tab, type the Subclient Name.
-
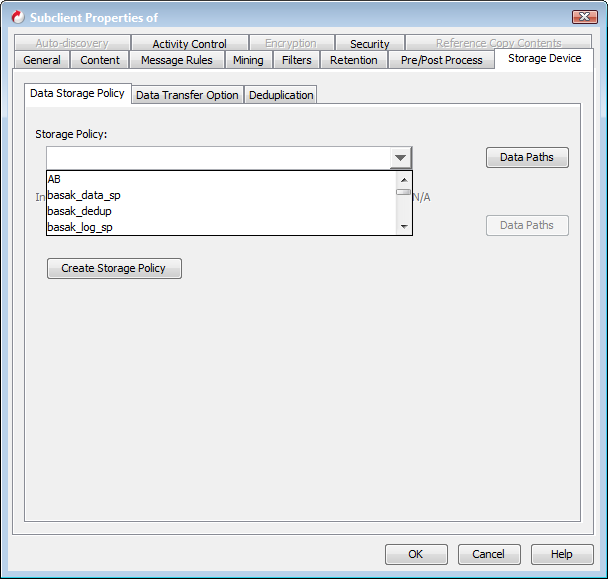
Click the Storage Device tab.
-
Select the Storage Policy from the list.
-
Click OK.
-
If you do not have storage policy created, create one.
-
Click Create Storage Policy.
-
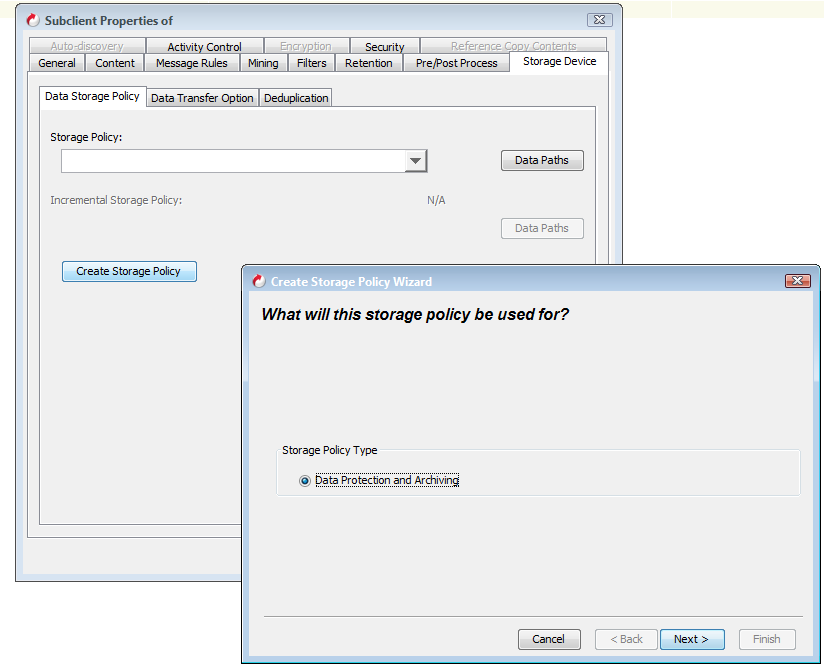
Follow the prompts displayed in the Storage Policy Wizard. The required options are mentioned below:
-
Select the Storage Policy type as Data Protection and Archiving and click Next.
-
Enter the name in the Storage Policy Name box and click Next.
-
From the Library list, click the name of a disk library to which the primary copy should be associated and then click Next.
Ensure that you select a library attached to a MediaAgent operating in the current release.
-
From the MediaAgent list, click the name of a MediaAgent that will be used to create the primary copy and then click Next.
-
For the device streams and the retention criteria information, click Next to accept default values.
-
Select Yes to enable deduplication for the primary copy.
-
From the MediaAgent list, click the name of the MediaAgent that will be used to host the Deduplication database (DDB).
In the Location box, type the name of the folder in which the DDB must be located or click the Browse to select the folder, and then click Next.
-
-
Review the details and click Finish to create the Storage Policy.
-
-
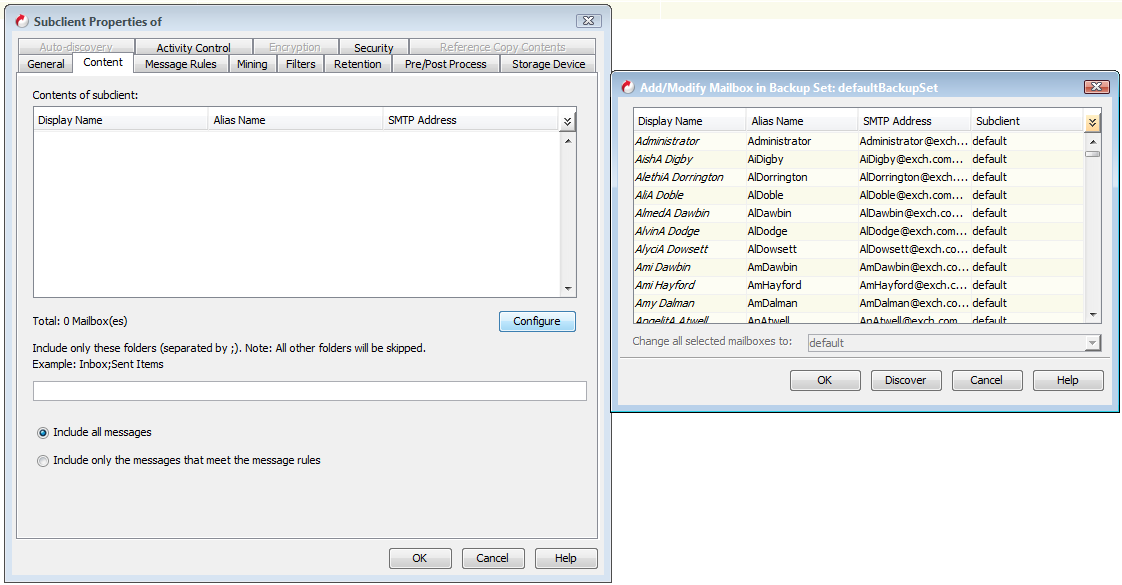
Click the Content tab.
-
Click Configure.
-
Click Discover.
-
Hold down the Ctrl key and click the mailboxes that are listed in the Mailbox Name list.
-
In the Change all selected mailboxes to list, click the name of the custom subclient.
-
Click OK.
-
Select Include All Messages to backup all the emails that are present in the selected mailboxes, and then click OK.