You can upgrade the operating system (OS) on new nodes that have an older image and are not part of an existing storage pool. This will ensure that the OS in the new nodes are in sync with the OS in the existing nodes, when it is attached to an existing storage pool.
Before You Begin
Identify the OS versions in the old and new nodes to make sure that the new nodes have an older image:
-
Use the following command to get the kernel version:
uname -r -
Use the following command to get the gluster version:
gluster --version
Procedure
-
Login to the node that has the remote cache configured.
Note
Use the system console to login to the node. For example, using KVM, not SSH.
Perform the following steps to identify the node in which the remote cache is configured:
-
From the CommCell Console ribbon, on the Tools tab, click Add/Remove Software > Software Cache configuration.
The Software Cache configuration dialog box will be displayed.
-
Click the Remote Software Cache tab.
Use the Configuring Software Cache list to identify the node in which the remote cache is configured.
-
-
Run the following command from the system console to add the new nodes:
./cvupgradeos.py -set_additional_nodes <new nodes list>Where:
<new nodes list>is a comma separated list of new nodes.For example:
./cvupgradeos.py -set_additional_nodes mynode004.company.com,mynode005.company.com,mynode006.company.comTip
Use
./cvupgradeos.py -lto view the help for the command. -
Download the latest updates and populate the remote cache as follows:
-
From the navigation pane, go to Manage > System > Maintenance.
The Maintenance page appears.
-
Click Download/copy software.
The Download/copy software section appears, showing the current feature release, the latest available feature release, and the last job that was run.
-
Click Run job
 .
.The Download/copy software dialog box appears.
-
Select Download software using Internet or Local Copy, depending on your environment.
-
In Download installation media, select the available feature release or maintenance release installation files that you want to download.
-
In Operating system options, select the Unix check box, and then select Linux x86_64 from the drop-down list.
Note
The latest OS updates will be downloaded, irrespective of the selected option.
-
In Remote caches to sync, select the HyperScale node in which the remote cache is configured.
-
Click Download.
Monitor the progress of the download job to ensure that the software is successfully downloaded and synchronized. For more information, see Viewing Jobs.
Tip
The download operation will automatically download the necessary RPMs once it identifies that the new nodes have an older image.
-
-
Upgrade the new nodes using the following command:
./cvupgradeos.py -upgrade_additional_nodesNote
cvupgradeos.pymust be run using the console. Do not runcvupgradeos.pyusing SSH.The following prompt will be displayed:
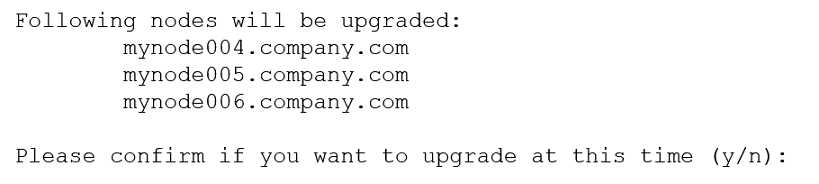
Important
Make sure that all the new nodes are listed.
-
Type
yand pressEnterto continue.The installation process will start. The updates will be installed sequentially on each HyperScale node available in the current cluster. At the end of update installation, each node will be rebooted before moving on to the next node.
The progress of the installation is displayed. (The sequence is also logged in /var/log/commvault/Log_Files/cvupgradeos.log.)
A message will be displayed when the installation process is finished.
What to Do Next
Add the nodes to the existing HyperScale Storage Pool as follows:
-
Using a web browser, launch the Command Center using the following URL:
https://<Commserver hostname>/commandcenter
-
Type the user name and password provided during the setup.
-
Click Login.
-
From the navigation, click Storage > Storage Pools.
The Storage Pool page appears.
-
From the Storage Pools page, click the name of the Storage Pool to which you want to the additional nodes.
-
Click Add nodes.
The Add nodes page appears.
-
From the Nodes list, select the number of nodes which you want to add.
Note
The number of nodes that you can add to a Storage Pool depends on the Resiliency of the Storage Pool.
-
Click Add.
This will add the new nodes to the storage pool.