If you already have a CommServe server that you want to use as the production CommServe host, then you must install only the CommServe Failover package.
Before You Begin
-
Make sure that the CommServe is installed before installing the CommServe Failover package.
-
Verify that the prerequisites needed to setup the environment are available before setting up the High Availability CommServe Host feature. For more information, see Planning for the High Availability CommServe Host Setup in a Linux Environment.
Procedure
-
Log on to the production CommServe host as root.
-
Download the Commvault software installation packages from the Commvault Store.
-
Navigate to the folder, or mount point, containing the software installation packages and run the following command.
./cvpkgadd -
The OEM Selection screen appears.

Select Commvault (or the appropriate OEM) and then click Next.
-
The Welcome to Commvault Installer screen appears.
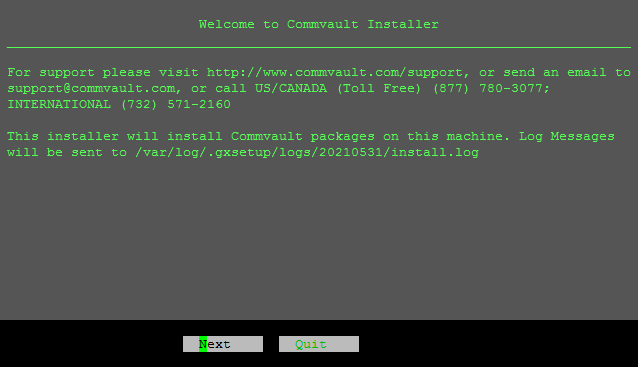
Click Next.
-
The Install Task screen appears.
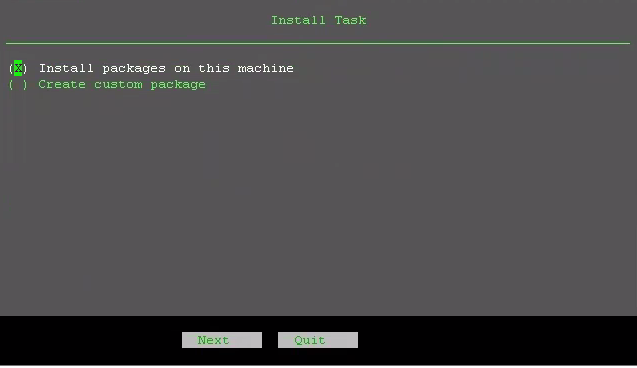
Select Install packages on this machine and then click Next.
-
The Instance Page screen appears.
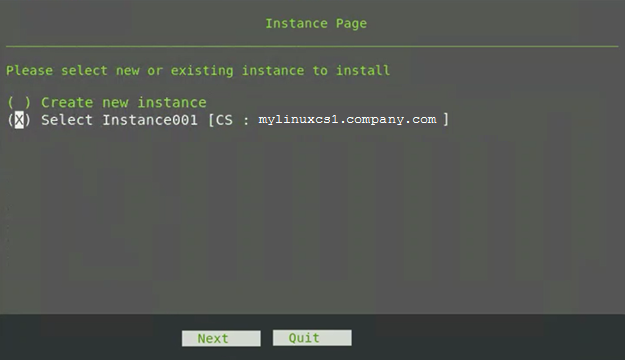
Select Select Instance001 (or the Instance associated with the CommServe instance) and then click Next.
Note
Do not select the Create new instance option.
-
The Install Task screen appears.
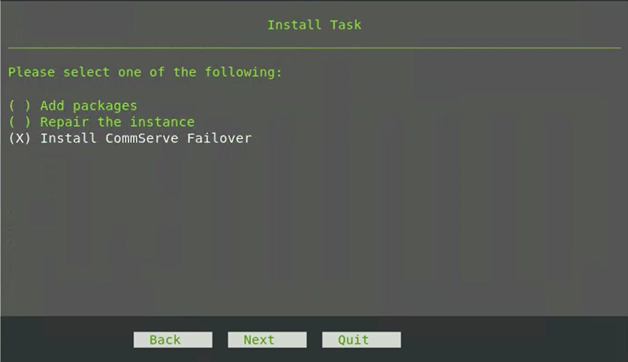
Select Install CommServe Failover and then click Next.
-
The Interface Selection will be displayed, with the available interfaces (NICs) in the server.

Select the interface to perform the installation and then click Next.
-
The Install Directory screen appears.
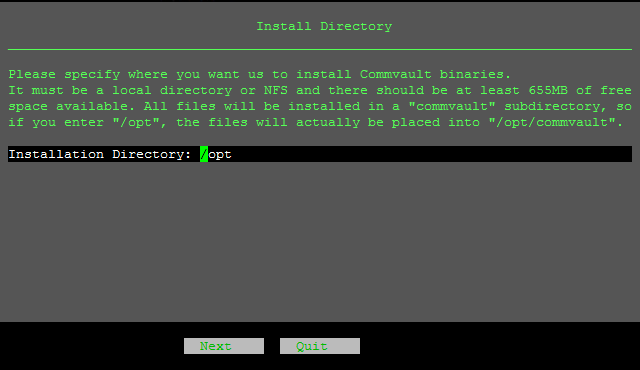
Verify the installation directory (or specify a new directory) and then click Next.
-
The Log Directory screen appears.
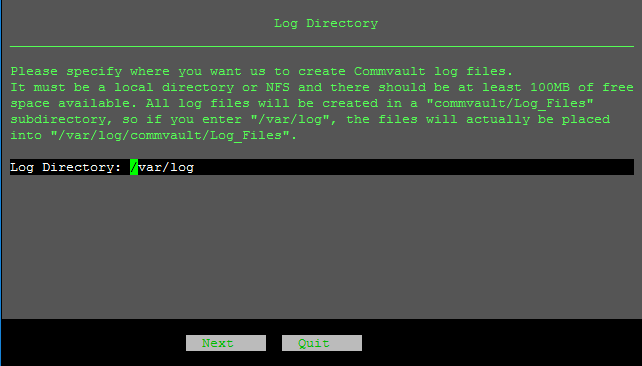
Verify the log directory (or specify a new directory) and then click Next.
-
The Unix Group Assignments screen appears.
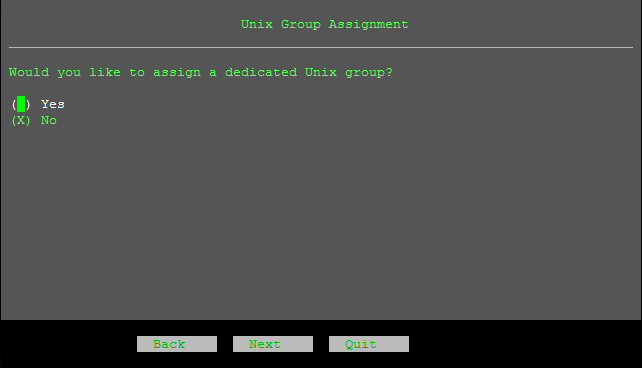
Select one of the following options:
-
Select Yes to assign full access permissions to both the group and other users, and then click Next. (Proceed to the next step.)
-
Select No to setup separate permissions for group users and other users, and then click Next.
The Permission Details screen appears.
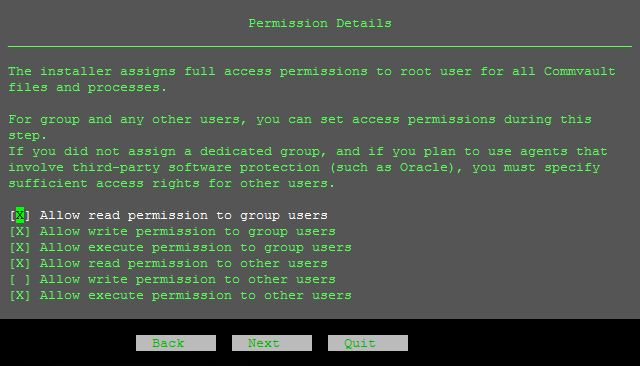
Select the necessary permissions for group users and other users, and then click Next.
-
-
The Client Host Information screen appears.
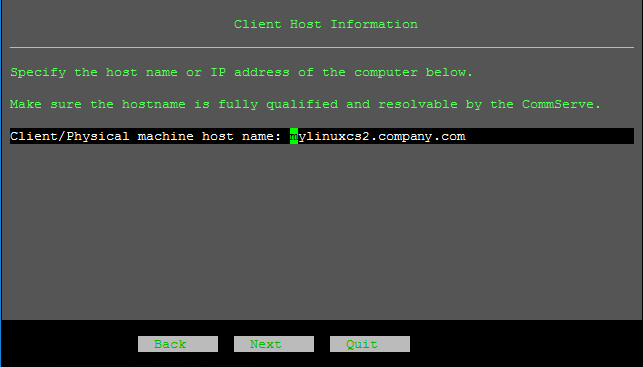
Verify the hostname for the production CommServe host, and then click Next.
-
The Client Information screen appears.
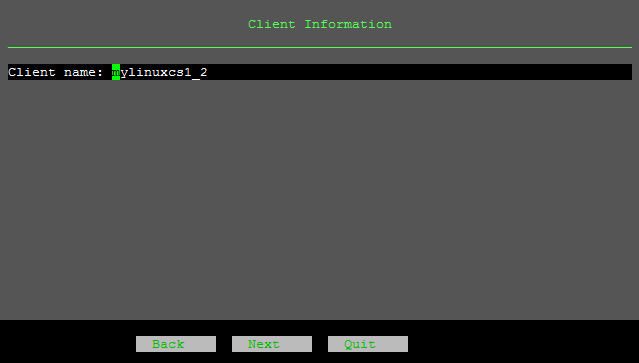
Verify the client name for the SQL client in the production CommServe host, and then click Next.
This is the standalone SQL agent installed in Instance002 which will be used for backing up the SQL database from the production CommServe host.
Tip
Choose a meaningful hostname to clearly differentiate this SQL client in the user interfaces like Command Center / CommCell Console. If necessary modify the Client name to make it easily recognizable.
-
The CVD/Network Port screen appears.
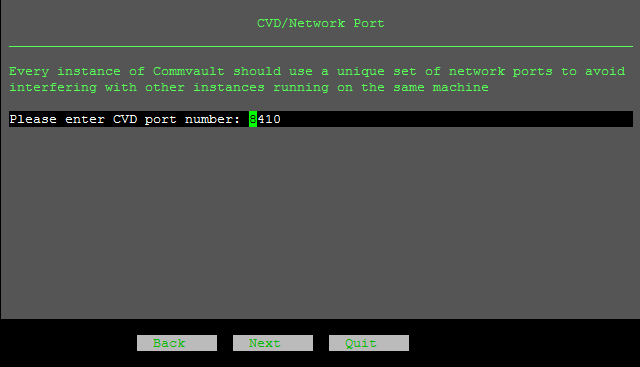
Verify the network port (or specify a new port) for the SQL client and then click Next.
-
The Summary screen appears.

Verify the summary, and then click Next.
The software installs the binaries for the SQL client (Instance002). This process may take a few minutes.
-
The Server Information screen appears.
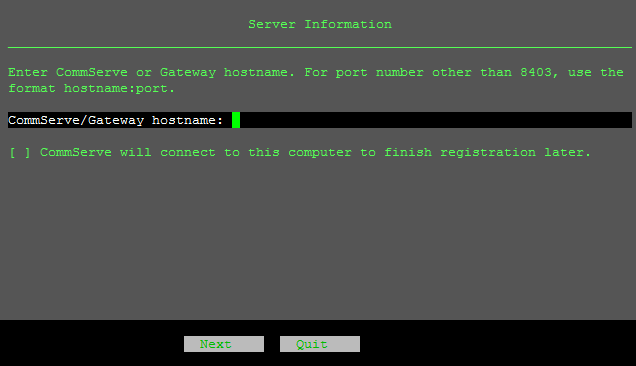
Type the hostname of the CommServe server (Instance001), and then click Next.
-
The Configure HTTP Proxy screen appears.
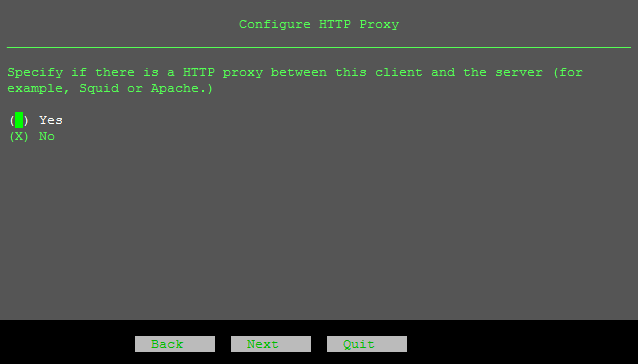
Select one of the following options:
-
Select No if there are no HTTP proxy server to connect to the CommServe server, and then click Next. (Proceed to the next step.)
-
Select Yes, if the SQL client must connect to the CommServe server through a HTTP server, and then click Next.
The Setting HTTP Proxy Configuration screen appears.

Enter the following information and then click Next.
-
Type the hostname or the IP address for the HTTP proxy server.
-
Type the port number that must be used to communicate with the proxy server.
-
-
-
The Server Authentication screen appears.
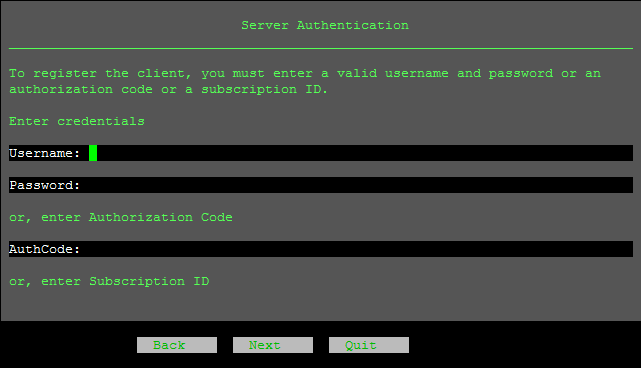
Type the Username and Password for the CommCell, or the AuthCode, if available. Click Next.
This is the Username and Password associated with the admin account that was added in the Commvault ID screen displayed while installing the production Commserve host.
-
The Installation Status screen appears.
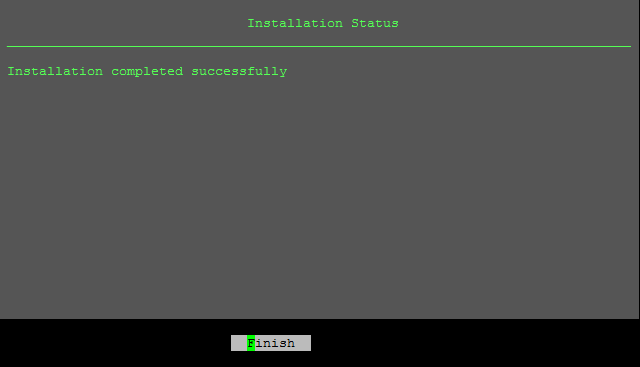
Click Finish.
Result
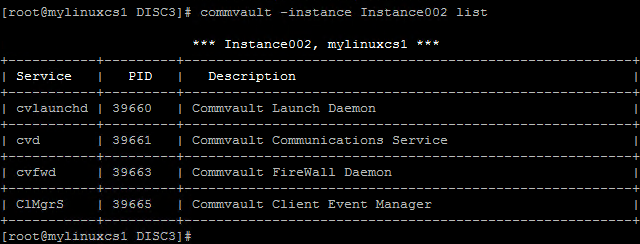
All the services will be installed and started in Instance002. You can view the services as follows:
commvault -instance Instance002 listClick here to view a sample output