A response file is required to perform the non-interactive restore of a client. This file stores the client configuration information backed up on a specific point-in-time. You can save the response files and use it later to restore the client.
Follow the steps given below to create and save the response file:
-
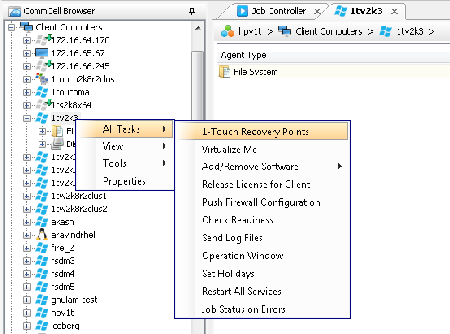
From the CommCell Console, navigate to <Client>
Right-click the <Client> and click All Tasks | 1-Touch Recovery Point.
-
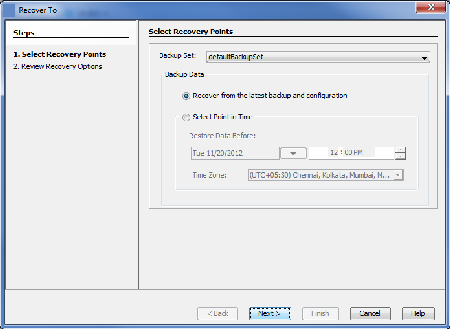
By default the response file will be created using the client configuration backed up by default backupset in the most recent backup.
Click Next.
-
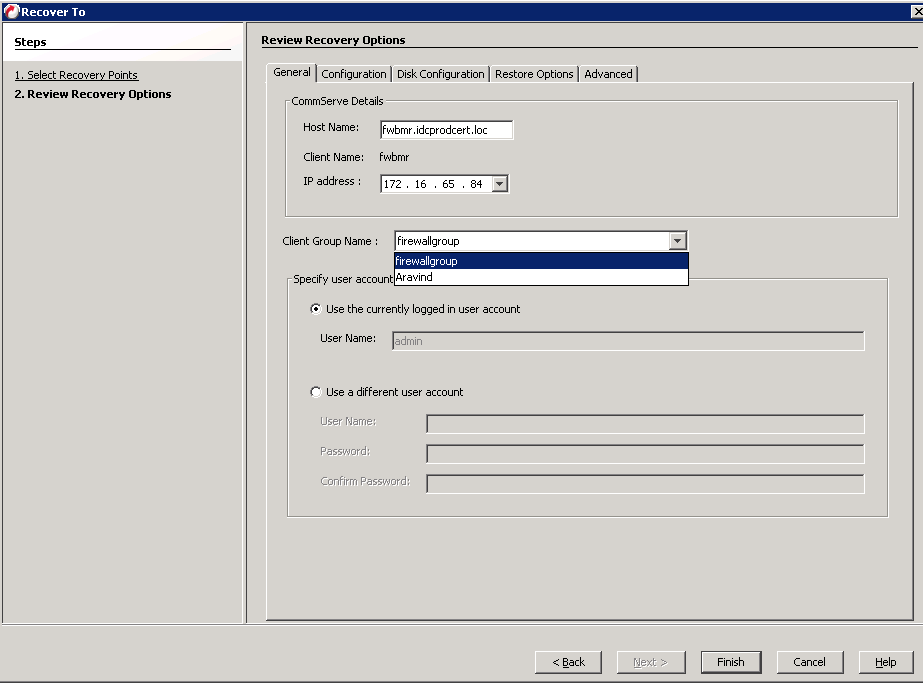
Click each of the following tabs to review the client configuration:
-
General tab
-
Configuration tab
-
Disk Configuration tab
-
Restore Options tab
-
Advanced tab
Click Finish.
-
-
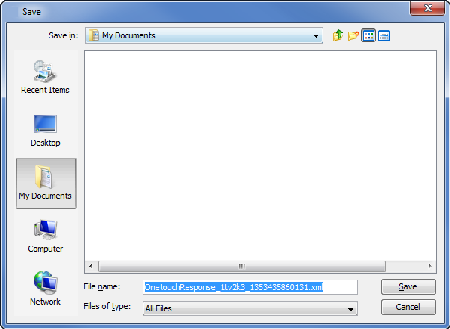
By default, the response file will be saved on the computer where you are running the CommCell console.
Click Save to save the response file at its default location.
If you want to save the response file on any other location on the computer or in the domain, specify the location and then click Save.
You can copy the response file to a network location or on a USB drive and use it later to perform the non-interactive restore.
Accessing the Response File from a UNC Path during a Non-Interactive Restore
You can access the recovery response file from a network location during the non-interactive restore. Follow the steps give below to perform the non-interactive restore when the recovery response file is stored in a network location::
-
Boot the client using the 1-Touch Live CD.
-
In the Language SelectionDialog dialog box, select a language from the list. To use the same language for the keyboard, click Use default keyboard for the selected language check box and click OK.
-
Click OK.
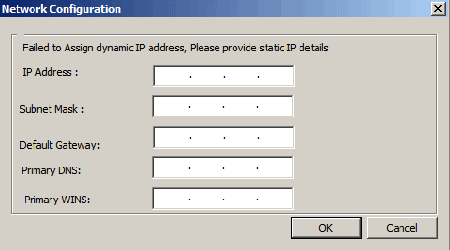
A temporary DHCP IP will be assigned automatically to the client that you are recovering.
-
If the temporary DHCP IP is not assigned automatically, you have to provide the Static IP, Subnet Mask Default Gateway, Primary DNS and WINS.
-
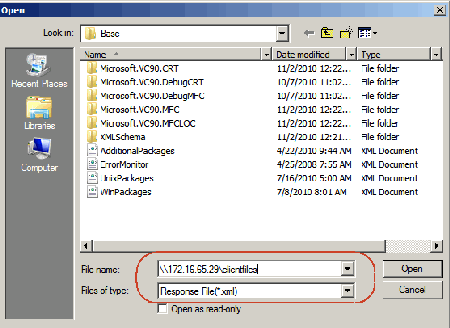
Enter the UNC path of the location where the response file is located and click Open. The full system restore starts.
The permanent IP address of the client will be the IP address that is stored in the response file.