-
Verify and ensure that the old MediaAgent has the latest Commvault Service Pack.
If the MediaAgent does not have the latest service pack, you can install the service pack by using the CommCell Console.
After service pack installation, record the Service Pack number.
-
From the CommCell Browser, expand Storage Resources | MediaAgents.
-
Right-click the appropriate MediaAgent, and then click Properties.
-
Click the Version tab.
-
Record the service pack version displayed under the Version information.
-
-
Record the list of Commvault packages installed on the old MediaAgent.
-
From the CommCell Browser, navigate to Storage Resources | MediaAgents.
-
Right-click the appropriate MediaAgent, point to View, and then click Installed Softwares.
In the Installed Software dialog box, record the list of Commvault packages that are installed on the old MediaAgent.
-
-
Record the associated Storage Policies.
-
From the CommCell Browser, navigate to Storage Resources | MediaAgents.
-
Right-click the appropriate MediaAgent, and then click Properties.
-
Click the Associated Storage Policies tab and record the listed Storage Policies.
-
-
Record the associated client information.
-
From the CommCell Browser, navigate to Policies | Storage Policies.
-
Right-click the appropriate storage policy, and then click Properties.
-
Click the Associated Subclients tab and record the listed clients.
-
-
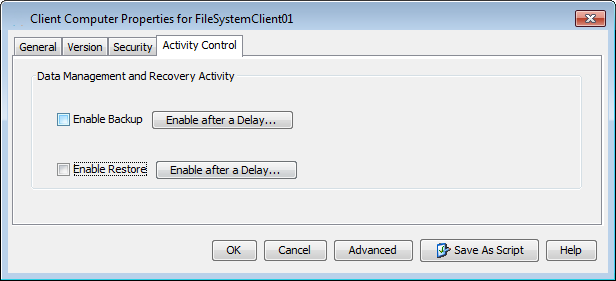
Disable all job activities on each client.
-
From the CommCell Browser, navigate to Client Computers.
-
Right-click the appropriate client, and then click Properties.
-
Click the Activity Control tab.
-
Clear the Enable Backup and Enable Restore check boxes.
-
Click OK.
-
-
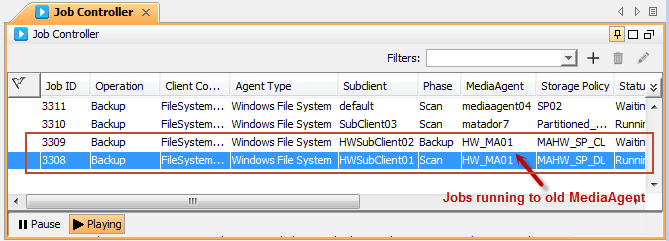
Stop all running jobs, or wait for the jobs to complete.
-
On the ribbon in the CommCell Console, click the Home tab, and then click Job Controller.
-
From the Job Controller window, click the MediaAgent column to view the list of jobs that are running on the old MediaAgent.
-
Stop all running jobs or wait for the jobs to complete.
To stop the running job, right-click the job, and then click Kill.
-
-
If you have a disk library, perform one of the following operations:
-
If you have a local mount path, move the local mount paths in the library to another location on the new MediaAgent.
For more information, see Move Mount Path. You can perform the move mount path operation during the setup of the new MediaAgent.
-
If you have an UNC or NFS mounted path, or Cloud or HP StoreOnce libraries, then share the new MediaAgent with the corresponding path in library. For more information, see Advanced - Share a Mount Path.
-
-
Disconnect the tape library from the old MediaAgent, and then connect the tape library to the new MediaAgent.
Note
Do not deconfigure the library from the CommCell Console.
-
If you have configured the Remote Software Cache on the old MediaAgent, then record all the clients associated with the old MediaAgent.
-
On the ribbon in the CommCell Console, click the Tools tab, and then click Add/Remove Software.
-
Click Software Cache Configuration.
-
In the Software Cache Configuration dialog box, click the Remote Software Cache tab.
-
Under Computer column, select the old MediaAgent, and then click Edit.
-
In the Modify Remote Software Cache Information dialog box, click Add/Remove Clients.
-
Record all of the clients and client groups listed in the Selected Clients/Client Groups box, and then click OK.
-
Click OK.
-
-
Copy the contents of the index cache directory.
To know the location of the index cache directory, complete the following steps:
-
From the CommCell Browser, expand Storage Resources | MediaAgents.
-
Right-click the appropriate MediaAgent, and then click Properties.
-
Click the Catalog tab.
The current location of the index data appears in Index Directory.
-